Interactive treelights

It's the festive season! So I made this interactive tree to brighten and cheer up to my desk. It senses that I'm there, reacts when I talk to it (I like to think so, but in reality it reacts to any loud enough noise) and switches off when I leave.
There is much more to it than being a pretty ornament: it showcases how Bendyroad supports the use of multiple timers. No less than five independent timers are in use here.
Materials used
- Arduino Mega (or Uno)
- FC-04 sound detector
- Passive infrared sensor HC-SR501
- A light sensor
Light sensor
A GY-30 I2C light sensor module, or an analog light sensor (LDR) works just as well, if using an LDR you'll also need a 10K resistor
For the lights
- 6 LEDs, size 3mm, in 3 colors (colors not a requirement)
- 3 100 Ohm resistors
- wire
- 3 breadboard jumper wires
- heat-shrink tubing
If you are sure you will always use all three LED-strings together, you can connect the three ground wires together. I wasn't sure so I made them suitable for separate use. You may have to tweak the resistor values to get equal amounts of light from the different colour LEDs.
Assembly

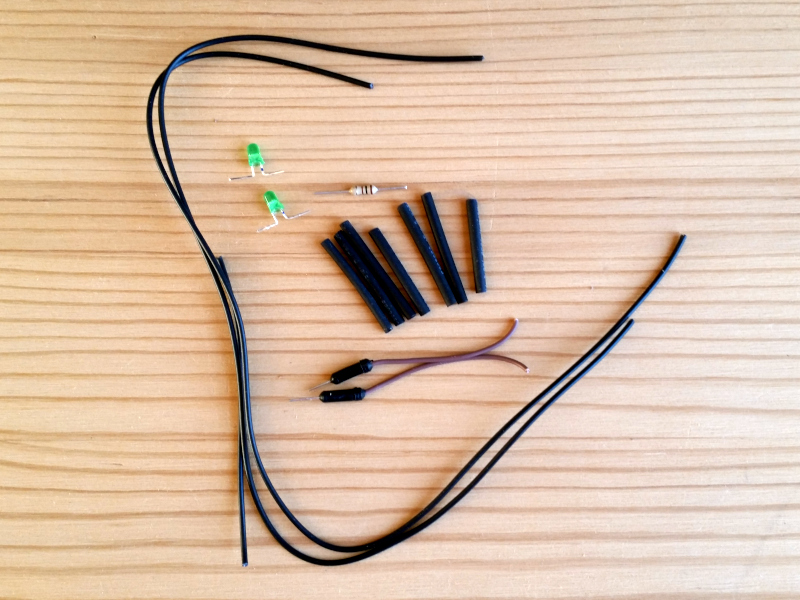
First I tested if the LEDs were OK, and if two LEDs in series could be driven from one digital output. Then I marked the long (anode) leads before bending and trimming them. Then prepared 2 long pieces and 1 short piece of wire for each 2-LED 'string'. I sacrificed one breadboard jumper wire to create two plugs on either end of the long wires. Then I put the pieces of heat-shrink tubing in place. Soldered everything together like this:
half a jumper wire - resistor - long wire - LED 1 - short wire - LED 2 - long wire - other half of jumper wire
And tested the assembled LED'string', so I was sure it was working before using the hot air on the heat-shrink tubing. I could say the tubing enhances aesthetics, but it's also great to hide soldering work - I need that ;-)
Configuring the tree
Assembling the hardware took the most time, but from here on, you're almost done. Making the firmware with Bendyroad is super quick.
Functions of the firmware
The PIR sensor is triggered by changes in its infrared view of the world. A human is much warmer than the surrounding environment, so whenever I move, the sensor 'sees' it. For more information see: Notes on the HC-SR501 PIR sensor.
The red LEDs blink for a while whenever I move. The sound sensor responds to sound waves (it is a very basic thing, it cannot distinguish frequency, or record speech), but it can detect an increase of noise. When there is enough noise, the green LEDs blink for some time. Whether it's me talking, or enthusiastic co-workers, doesn't matter. And then there is the light sensor, that I set up to enable the blinking yellow LEDs as long as there is ambient light. If it is completely dark, all LEDs are off.
Initially I wanted the LEDs off when it was silent AND dark AND no movement, but that can be annoying and/or provoke undesirable reactions by pets. It is easy enough to change.
Experiment with it

Download the example program: xmastree.prg and save the file 'xmastree.prg' in your Bendyroad Development Studio work directory.
Start the Bendyroad Development Studio and open the example.
Check if the right development board is specified; that's under 'Hardware', default is an Arduino Mega. If you use an Arduino Uno, delete the Arduino Mega (right-click, then delete), and add an Arduino Uno, and give a name to the Mega.
If you want to change any of the default settings or behavior, change them in the Development Studio.
More ideas
- More or other sensors; for example temperature or VOCs (Volatile Organic Compounds, ethanol is one)
- Using RGB LEDs